![]()
I sometimes find a snake in my chicken coop. It’s usually a non-venomous fellow maybe three feet long and after eggs or mice. I have a snake grabber and re-locate the snake down by the creek. I want to share my world with snakes but not too closely.
Dr. Alexander Hastings (Acherontisuchus in SL) is a palaeontologist who discovered a huge prehistoric, 60 million years ago, boa-relative and named it Titanoboa. It reached 13 meters in size and weighed 1.25 tons. This snake would crush my chicken coop and gobble my chickens like pieces of popcorn.
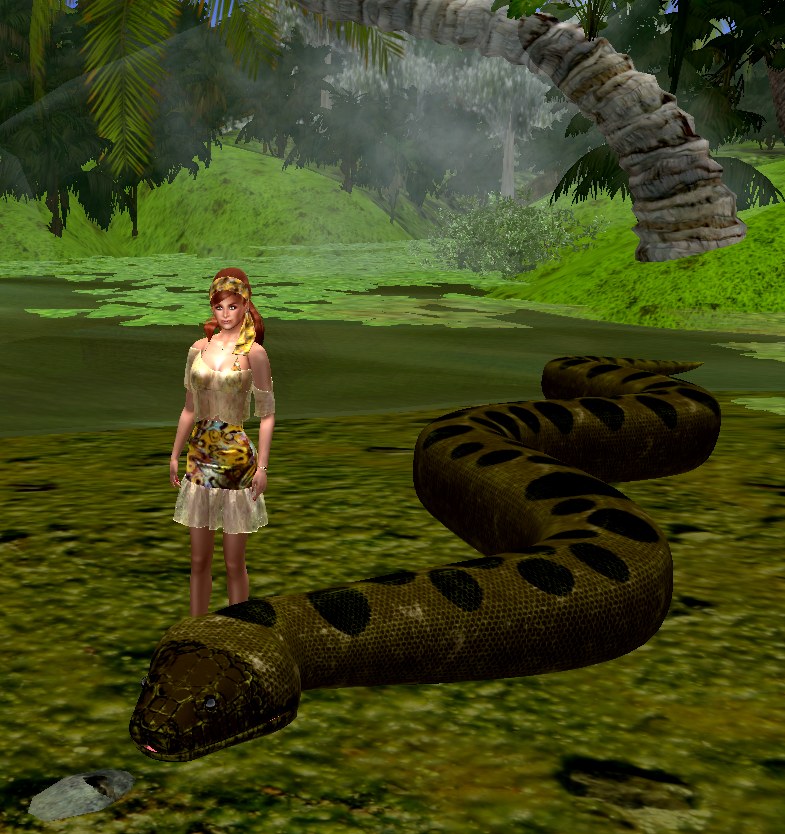
While I’d rather not meet a nearly 40 foot long snake in real life, it’s a treat to interact with one in Second Life. The Science Circle has set aside an area that has been built to resemble a hot, swampy environment in what is now Colombia, South America. This environment was built by Dr. Linda Kelly (Delia Lake in SL). Living in this environment is a 3D animation of a Titanoboa. This marvelous animated object was created by Dr. Gregory Bollella (GmanB in SL). You can visit this environment and observe the snake capturing a huge crocodile and just generally scooting about in the swamp. Follow this link to visit Titanoboa.
I’m always interested in the how of things and how does one build a 3D, animated, 40 foot long snake? I asked Dr. Bollella to explain. “First, I will draw the distinction between textural and procedural. Then give you some starting, simple examples. Review them and then give a more complex example.
“Consider a red solid circle on a white background one wants to apply to one face of a 3d cube representation in SL. The older/original mechanism for accomplishing this was to find an image (bit map) of a circle on a background. Then, possibly, using a tool like Photoshop to replace the colors to those desired, save the image, import to SL, and apply. This is the textural method. The procedural method eliminates that first step, i.e., finding an image. In a procedural tool for creating textures (yes procedural methods still produce a texture file, an image, but it is the end product NOT the input) one would start with the equation of a circle and assigning red to points that evaluate to be within the circle and white to points that evaluate to being outside. Then a image file of this is produced, imported to SL, and applied just as in the textural method. The difference is that the circle has been defined mathematically and can be manipulated easily if changes are needed. Say one wanted a smaller circle, in the textural method one would have to find another image or do some copy/pasting and scaling in Photoshop. In the procedural method a smaller circle can be created by simply changing a single parameter of the equation.
“For the simple example, let’s suppose that one wanted to make a polkadot pattern. You can see easily that with the textural method one would have to find an appropriate image or do Photoshop copy/paste/scale, etc. With the procedural method one would input the circle equation into a function that copied and scaled the input and placed the results in a parametrized grid function.
“At this point, you might be thinking that the procedural tool is doing the same thing as the artist did in Photoshop, and you would be correct. The advantage of procedural texture creation doesn’t become clear until one considers complex textures.
“For the complex example, let’s consider the eyes of a cat (which I happen to be working on right now). An artist created a Procedural Eye Generator for one of the tools I use. I purchased this ($10). Now, I am able to create textures for an almost infinite number of variations. Pretty much everything is controllable via sliders. Pupil shape and size. Iris shape, size, depth, 4 colors for various parts. Sclera color, veins, color, etc. In the textural method one would have to find an image of eyes and the try to manipulate in Photoshop. But, the changes would be very limited and very difficult to get looking right.
 “Additionally, when one creates textures procedurally we also create other ‘maps’ to tell the rendering engine more information on how the artifact should look. These are the roughness map, normal map, ambient occlusion map, displacement map and more. The normal map tells the renderer which direction a light ray should bounce off every pixel of the texture. This can give a very real illusion of depth. Roughness tells the renderer for each pixel how shiny or dull it should be. Ambient occlusion tells the renderer about shadow areas on the object, typically from other parts of the object. Displacement tells the renderer how much above or below the zero level a certain pixel should be and some render engines can use this information to actually deform the mesh to the proper height. There a many more maps but those are the basic once.
“The Titanoboa model has 28 faces and each has three texture maps applied, color, normal, and roughness. These maps were created procedurally in two tools, Substance 3D Designer and Substance 3D Painter.”
Further background on how the initial 3D shape is developed is presented the the article by Ziegler et al below.
References
- Museum curator shares ‘Secrets of the Dead,’ Amie Knowles, Martinsville Bulletin, Nov 2, 2016.
- Giant boid snake from the Palaeocene neotropics reveals hotter past equatorial temperatures, J. J. Head et al, Nature, Feb 5, 2009.
- Applications of 3D Paleontological Data at the Florida Museum of Natural History, M. J. Ziegler, Fronters in Earth Science, Dec 9, 2020.
 |
| Visits: 1623325 |